Many homeowners view their roof, gutters, and chimney as three distinct parts of their home. However, overlooking the interconnectivity of these three systems can lead to costly repairs, point out Keyrenter Newport Beach experts. For example, water overflow from clogged gutters can damage the fascia board, which in turn can loosen the flashing that seals the chimney to the roof. A weakness in one area can negatively impact the others. That’s why it’s more efficient and cost-effective to maintain all three together on a regular basis.
Why these three systems are really one system
Your roof sheds the rain. Your gutters carry that water away from the structure. Your chimney punches a hole right through both of them and has to stay sealed against everything the roof and gutters are trying to manage. When one part fails, it doesn’t stay contained.
A cracked chimney crown lets rain travel down into the flue and firebox. Clogged gutters back water up under the shingle edge near the chimney base, which is exactly where flashing is already vulnerable. Ice dams form when heat escapes unevenly through the roof and gutters can’t drain the meltwater fast enough, and that trapped ice works its way under shingles and around chimney flashing at the same time. None of these are separate problems. They’re the same problem showing up in three places.
That’s why this checklist is organized by season instead of by component. You’re not doing “gutter maintenance” in spring and “chimney maintenance” in fall as unrelated chores. You’re running the same envelope through two passes a year.
The spring pass: roof and gutters after winter
After the last freeze of the winter season, it’s time to get out the ladder (or more accurately, have someone else get out the ladder) for a two-fold roof inspection. First, check the surface of the roof itself. Check asphalt shingles for curling edges, cracking, and granule loss – granules wear off over time, but if a disproportionate quantity washes into the gutter or is lying on the ground, the roof might be nearing the end of its lifespan. Look at the sealant around any roof penetration – the plumbing vent, skylights, and especially the chimney. Sealant degrades faster than you think, and the sunny, southwestern exposure typically fares the worst.
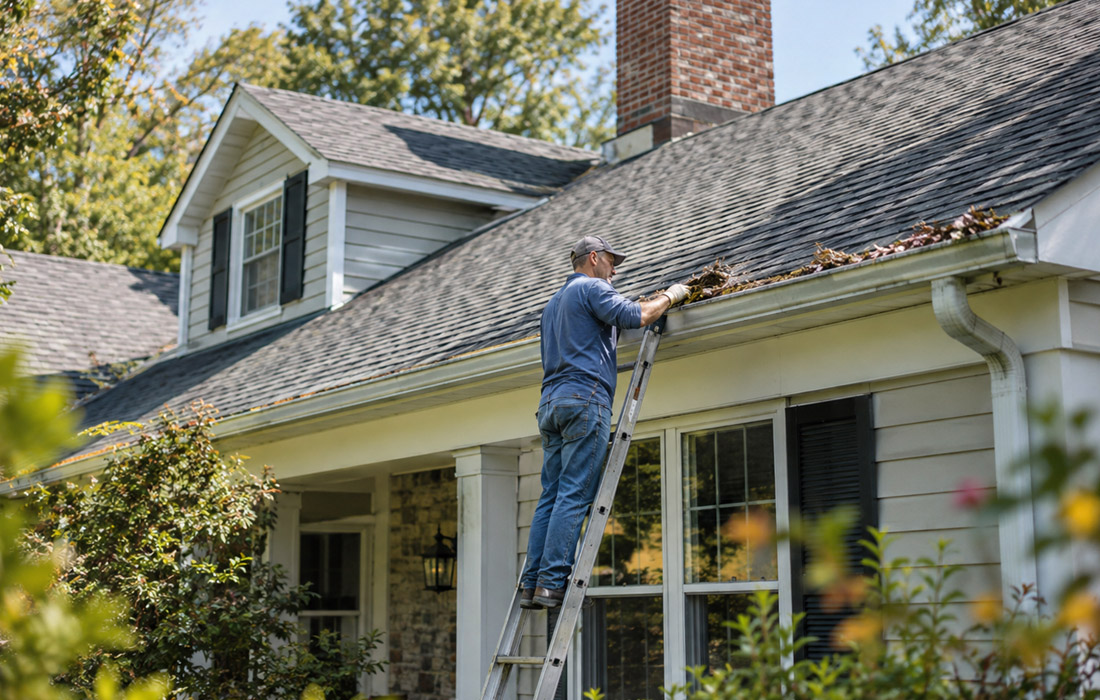
Second, put the ladder or spotter in a different spot and look into the gutter instead. Clean out whatever accumulated through winter and then flush each downspout with a hose to ensure the downspout actually takes water from the gutter and isn’t blocked somewhere underground. This will also give you a good indicator of gutter pitch. Gutters need a slight slope toward the downspout, roughly a quarter inch of drop for every ten feet of run. If there’s a hanger in the wrong spot or if a long run has sagged or creased, you’ll see standing water in the trough instead of draining. That stands for rust, sag, and eventually a gutter that pulls away from the house altogether.
The fall pass: leaves, pitch, and foundation drainage
Cleaning your gutters in the fall is often touted as being more important than cleaning them in the spring. In most regions, it is. This is when the majority of the year’s leaf drop occurs. If you do the job before the leaves have fallen, they’ll just drop in again after you’re done. When the trees are bare, you may be able to see any other obstructions that may be causing problems.
Do the job too early and the gutters will just fill up faster as new leaves come down. So you’ll be doing the same job again in three weeks. A second clean in November will usually see you through the winter.
When you do clean the gutters, check the fall on the gutters as you go. It’s easy to knock the fall out of a gutter or to alter the position of a bracket hanger when you are scooping goo out of a gutter. Summer storms may also have shifted the hanger and less likely the gutter itself. Most gutter problems are caused by lack of maintenance, so best check for these small issues regularly. Fix any low spots now. Luckily, as long as you’re up the ladder, you can fix many by installing more hangers.
Also, add gutter bracket hangers if needed and extend the downspouts so they discharge water at least 4 ft. from the foundation. This sounds like a minor detail but downspouts that discharge next to the foundations are a leading cause of basement seepage and soil saturation that eventually shifts the foundation itself.
Inspect the fascia boards while you’re at eye level with them. Fascia rot is one of the first visible signs that gutters have been overflowing, even if you never saw it happen. Soft wood, peeling paint, or dark staining along the board means water has been sitting against it longer than it should have. Catching this in fall, before winter moisture makes it worse, saves a much bigger repair later.
Creosote: what it is and why its stage matters
Creosote is the flammable residue left behind when wood doesn’t burn completely, and it builds up on the inside of the flue every time you use the fireplace. It develops in three stages. The first stage is flaky and loose, brushes off relatively easily, and is the least dangerous. The second stage is tarry and sticky, harder to remove, and starts to restrict airflow. The third stage is glazed – shiny, hardened, and bonded to the flue liner almost like a coating of black glass.
Glazed creosote is the most dangerous stage by a wide margin. It’s also the hardest to remove, often requiring rotary cleaning tools instead of a standard wire brush, and it’s highly combustible. This is the stage most closely tied to chimney fires. When your visual inspection turns up heavy or glazed buildup in the flue, this is the point where you stop inspecting and schedule professional chimney cleaning. Trying to scrape glazed creosote out yourself with basic tools usually just polishes it further instead of removing it, and disturbing a heavily creosote-lined flue without the right equipment isn’t worth the risk.
The scale of that risk is real. The National Fire Protection Association, and figures widely cited by the Chimney Safety Institute of America, put chimney fires at roughly 25,000 incidents a year, with over $125 million in resulting property damage. NFPA 211 exists specifically because of numbers like that, recommending annual inspection and cleaning for exactly this reason. A once-a-year sweep is cheap insurance against a statistic you don’t want to become part of.
The nine-point chimney walkaround
Before the first fire of the season, you’ll want to walk the chimney system top to bottom. We’re not asking you to risk life or limb crawling around the steepest sections of your roof. We’re just saying you should have a proper, first-hand look at the whole thing, and not settle for a glance from the yard.
Start at the crown. That’s the concrete slab at the top of the masonry that’s supposed to be shedding water off the structure, not letting it seep through cracks and pour down the inside of your brick and flue system. It’s pretty vital. So is the cap, which is the mesh hood that’s supposed to be keeping rain, debris, and animals out while also hopefully keeping the sparks in. Make sure it’s still intact and securely attached. See if the spark arrestor mesh inside it is torn or if it’s gunked up with a few years’ worth of soot. Give the visible mortar joints a good visual once-over for gaps or crumbling. Mortar is your structural glue and it can’t be missing. Or holding volumes of water against your wood frame. If you can spot some of the flue liner, give it a once-over for tile cracks and gaps.
Inside the house, open and close the damper. Make sure it’s both free moving and sealed shut and not letting conditioned air blow up and out of your flue. Check the firebox walls for spalling brick which looks a lot like the face of the brick flaking or chipping and means, guess what, water break. Give the wall a good, hard look for efflorescence, that chalky white scum that shows up when water moves through masonry and leaves mineral deposits behind. If you’ve got efflorescence, you’ve got water.
Reading the moisture warning signs
In addition to a visual inspection, there are some common signals that can indicate moisture infiltration into the system, and while you may not know exactly where water is entering, it’s breached somewhere in the system. Efflorescence staining on your exterior masonry is a dead giveaway. Rust on the damper or firebox metal is another sure sign – metal rusts not from just humidity but from sustained water contact. Musty smells near the fireplace are pretty good indicators that water stands somewhere in the flue or firebox. And if you get interior wall stains near the chimney chase, that’s about the most serious sign you can get because if you see water on a finished wall, a whole lot of masonry or flashing, or both, has already been breached.
None of these signs tell you exactly what’s wrong on their own. Together, they tell you it’s time to call someone who can trace the water path and fix it before another season of freeze-thaw cycles makes the damage worse.
What’s DIY and what isn’t
Homeowners can take on much of this checklist safely. Clearing gutters, flushing downspouts, making a visual roof inspection from a stable ladder, and inspecting the chimney crown and cap from the ground or a low vantage point are all within the reach of reasonably careful and handy people.
Steep-slope roof work, flashing and masonry repointing all require special tools, fall protection gear, and enough knowledge to understand that a “minor” crack may also have major structural implications. Flue cleaning falls into the latter category, too, and not just because it’s a strenuous job wielding a brush or rotary tool on the end of a long rod. A trained sweep is also looking for a carbon monoxide hazard from a partially blocked flue, which can produce no obvious warning signs inside the home until it’s too late. This is not the place to try to save fifty bucks.
Don’t forget the animals
One important maintenance task that is often overlooked is to visually check the chimney cap from the ground periodically, especially after storms or at seasonal intervals. Squirrels, raccoons, and birds will all happily set up house in an uncapped or poorly capped chimney, and you’d be amazed how blocked a flue can get by nesting material without any obvious signs in your home. You won’t smell the smoke backing up until you have a fire in the fireplace, and by then it’s a serious hazard. A good chimney cap is probably the cheapest prevention on this list.
The payoff for an hour of seasonal work
Perform this maintenance checklist every six months and you’ll head off a pile of expensive repairs. Your shingle roof will last its full warranty term rather than fail prematurely due to trapped moisture. Your masonry won’t sustain the kind of water damage that leads to thousands of dollars in repointing costs or worse, crown replacement. Fascia and soffit boards won’t rot in place over a decade of hidden overflow. And the margin of fire safety on your chimney won’t decrease by a degree or so every year, inching you ever closer to that 25,000-fires-a-year statistic.
The whole regimen doesn’t even take a weekend to complete. A spring pass, a fall pass and one seasonal chimney walkaround tally up to an hour or two of your time at most, plus whatever professional maintenance you need done because of what your self-inspection uncovers. So long as you regard the roof, gutters, and chimney as part of a single water management system, spending a few minutes twice a year doesn’t become a major hassle. It remains the least-cost way to stay a step ahead of serious home care issues.