Key Takeaways
- Divide the project into stages instead of trying to clear the entire property at once.
- Sort items before loading a vehicle or container to avoid mixed piles and disposal mistakes.
- Keep usable goods, recyclables, ordinary debris, and restricted materials separate from the start.
- Plan for each room’s contents, weight limits, access challenges, and safety needs.
- Check local collection rules before setting out bulky items, electronics, appliances, or hazardous products.
A home cleanout can be necessary before a move, renovation, estate transition, rental turnover, or long-overdue decluttering project. The work feels more manageable when there is a clear destination for every item, whether that means keeping it, donating it, recycling it, or arranging disposal. For projects that generate a steady amount of non-hazardous debris, roll-off style dumpster rentals can be an option to consider alongside curbside collection, drop-off locations, and hauling services.
The goal is not to empty every room as quickly as possible. A successful cleanout depends on making careful decisions early, protecting people and property while work is underway, and avoiding the need to sort the same material twice.
Why Home Cleanouts Feel Overwhelming
One crowded room can contain clothing, paperwork, broken furniture, food, chemicals, old electronics, and items with sentimental value. That mix makes it easy to lose momentum. Garages and basements are especially challenging because they often hold heavy tools, building materials, seasonal supplies, and boxes that have not been opened for years.
A common mistake is starting without labels, bags, or a destination in mind. Instead, start with one defined area and move items into planned categories as they leave the room. This prevents a cleared bedroom from becoming a new storage area for unsorted piles.
What To Do Before Starting
Set a specific objective before moving anything. You may be preparing a property for sale, creating space for renovation, helping a relative downsize, or clearing a home after a tenancy. Then walk through the entire property, note unusually heavy items, take photos of packed spaces, and estimate how many work sessions the project may require.
- Gather work gloves, closed-toe shoes, sturdy bags, boxes, labels, markers, tape, and basic cleaning supplies.
- Measure tight doorways, stairwells, and pathways before moving large furniture or appliances.
- Check collection limits and pickup schedules for your address.
- Review local rules because recycling instructions and accepted materials can change. For example, local recycling rules can be updated, so current guidance matters more than old assumptions.
Create a Simple Sorting System
Use clearly marked boxes, bins, or floor zones for five categories: keep, donate or sell, recycle, dispose, and special handling. Put the labels where everyone can see them. Sort an item immediately rather than setting it aside “for later,” unless it requires a family decision or document review.
- Keep: Items that will remain in the home or move with the household.
- Donate or Sell: Clean, functional belongings with continued use.
- Recycle: Materials accepted through a local recycling program or drop-off site.
- Dispose: Broken, worn-out, or unusable non-hazardous debris.
- Special Handling: Batteries, chemicals, paint, fuels, electronics, and other restricted items.
Use a Room-by-Room Cleanout Plan
Kitchen
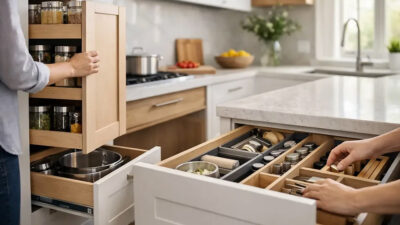
Empty cabinets, drawers, the pantry, and the areas beneath appliances. Separate unopened shelf-stable food that may be eligible for donation from expired or damaged food. Review cookware, small appliances, packaging, and broken dishes separately. Refrigerators and freezers may need special arrangements, particularly if they contain refrigerant.
Bedrooms and Closets
Sort clothing, linens, shoes, books, furniture, and personal items. Keep a separate box for documents, photographs, jewelry, and items that need review before leaving the property. Check under beds, behind furniture, inside drawers, and on high closet shelves.
Garage and Basement
Expect tools, yard equipment, paint, automotive products, construction leftovers, and storage containers. Keep liquids and batteries away from ordinary debris. Flatten clean cardboard, group similar materials, and avoid loading loose sharp objects where someone could be cut.
Attic and Storage Areas
Wear appropriate protective gear before disturbing dust, insulation, or unknown materials. Watch for water damage, pest activity, mold, weak flooring, and fragile boxes. Do not attempt to carry oversized items down narrow stairs alone.
Handle Appliances, Electronics, and Hazardous Items Carefully
Not every unwanted item belongs in a trash cart or general debris container. Keep rechargeable and loose batteries separate. Set aside televisions, computers, printers, and other electronics for approved recycling options. Do not pour out, burn, crush, or combine paint, fuel, pesticides, cleaners, or unidentified liquids.
If a product is leaking, unlabeled, or damaged, stop handling it and contact the relevant local waste or hazardous-material program for instructions. Appliances may also have disposal requirements that differ by location.
Separate Donations and Recyclables
Donation and recycling decisions work best when made before materials become dirty, wet, or mixed with debris. Donate only items that are clean, safe, and functional, and call ahead before transporting large furniture or appliances. Keep cardboard dry, and separate metal, yard waste, and other materials when local programs accept them.
Collection systems differ, so check a current local guide before filling a bin. In Berkeley, for instance, the city’s waste sorting guide identifies different destinations for household items, including reuse, recycling, disposal, and special collection options.
Choose the Right Disposal Plan
- Regular curbside service: Suitable for small amounts released over several scheduled collection days.
- Donation pickup: Useful when eligible furniture or household goods remain in good condition.
- Recycling drop-off: Helpful for materials that do not belong in curbside collection.
- Professional hauling: Practical for heavy, awkward, or widely distributed items.
- Temporary debris container: Useful when non-hazardous debris will accumulate over several days.
Before choosing an option, ask which materials are accepted, whether weight limits apply, how long the service is available, whether extra fees apply and how driveways or landscaping will be protected.
Follow Basic Cleanout Safety Rules
Keep walking paths open, avoid stacking boxes beside stairs, and ask for help with bulky or awkward items. Wear closed-toe shoes and gloves, and add eye protection or a mask when dust, debris, or strong odors are present. Keep children and pets away from active work zones. Stop work if you find suspicious insulation, chemical spills, sharp waste, or possible mold.
Build a Realistic 2026 Cleanout Schedule
- Day 1: Walk through the property, gather supplies, and label sorting areas.
- Days 2 and 3: Clear bedrooms, closets, and living spaces.
- Days 4 and 5: Address the kitchen, garage, basement, and storage areas.
- Day 6: Complete donation deliveries, recycling drop-offs, and special-item arrangements.
- Day 7: Remove remaining debris, sweep rooms, and inspect the property.
Complete a Final Property Check
Before declaring the cleanout complete, inspect cabinets, drawers, closets, sheds, attics, basements, crawl spaces, and the areas behind large appliances. Remove personal documents, medications, labels, and valuables from outgoing items. Sweep floors, check pathways for damage, and confirm that every remaining donation, recyclable, special item, and debris pile has a clear destination.
A low-stress cleanout is built on preparation rather than speed. With a room-by-room plan, visible sorting categories, safe handling practices, and current local disposal information, even a demanding project can become a manageable sequence of tasks.