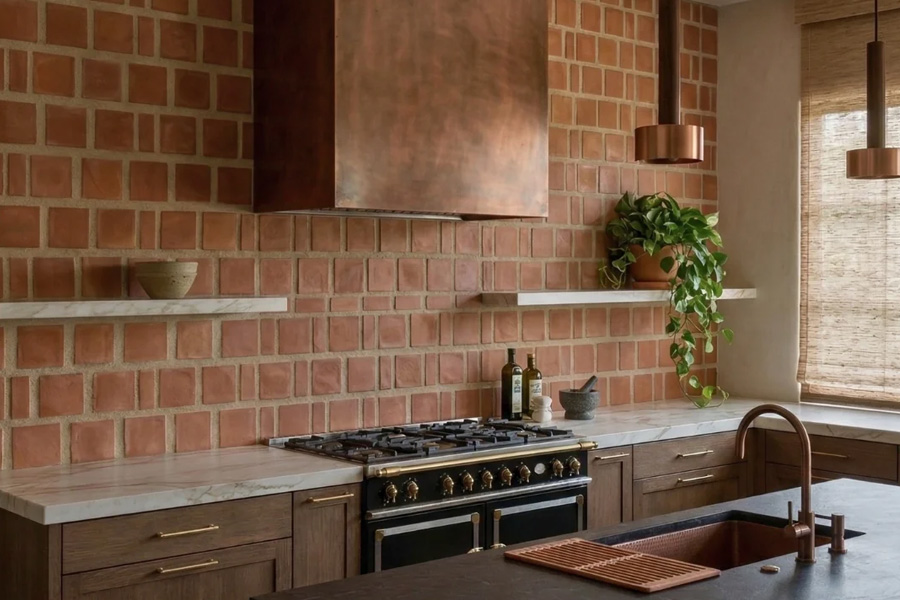
Understanding Cotto: What It Is and What It Is Not
Clay tiles shaped and kiln burned to create warm surfaces are called cotto. Often linked with terracotta, modern Cotto is more versatile than traditional farmhouses’ rustic, soft, profoundly porous tiles. Today, you can discover handmade pieces with wavy edges and color drift and precision-cut, denser goods for busy kitchens and baths. Some are unglazed for patina. Others are glazed or sealed for easy maintenance.
What Cotto is not: it is not a monolith. One vendor’s “Cotto” can differ substantially from another’s in water absorption, hardness, and tolerance for freeze-thaw cycles. Treat it like a created material rather than a commodity. Ask about porosity, intended use, and whether it is frost-resistant if your design wanders outdoors.
Color, Texture, and Variation
The magic of Cotto lies in variation. Iron-rich clays fire into siennas, blushes, and umbers that read like sunlight trapped in stone. You can choose:
- Unglazed tiles that darken subtly with sealers, deepening the earth tones.
- Glazed tiles that introduce sheen or color accents without surrendering texture.
- Washes and engobes that tint the surface while allowing the clay to breathe.
Expect batch shade variation. Take it in. Lay out pieces dry before installing to blend field tones. Shade calibrations and edges should be tighter if your vision is relaxed. Mixed lots, hand-molded edges, and trowel marks that reflect light like pond ripples provide movement.
Where Cotto Thrives Indoors and Out
Cotto’s tactile warmth turns hard flooring into a barefoot-friendly experience. Indoors, it excels in:
- Kitchens, where surface texture provides traction and color hides crumbs between cleanings.
- Entry halls and mudrooms, pairing beautifully with wood doors and plaster walls.
- Bathrooms and powder rooms, with glazed options around showers and unglazed on dry floors.
- Fireplaces, stair treads, and feature walls that benefit from heat-tolerant, kiln-fired material.
Outdoors, the choice narrows. Only specify frost-resistant Cotto in cold climates. For warm regions, covered porches and loggias are natural fits. Around pools or fountains, prioritize slip resistance and test-sealed surfaces for water exposure before full installation.
Performance Factors That Matter
A few technical details determine how Cotto performs day to day.
- Porosity and water absorption: Traditional terracotta may absorb significant moisture, which demands diligent sealing in kitchens and baths. Dense or vitrified Cotto absorbs less and resists staining better. Ask for absorption numbers or a description of the firing process.
- Slip resistance: For level indoor floors, look for a wet dynamic coefficient of friction in the slip-resistant range. Textured surfaces generally grip better than highly polished finishes.
- Thickness and dimensional tolerances: Handmade Cotto often varies in thickness, which means a thicker bed of mortar and a skilled hand. Machine-made tiles lay flatter, speeding installation.
- Thermal compatibility: Cotto pairs well with radiant heating. Its thermal mass stores heat, smoothing temperature swings. Leave movement joints at perimeters and transitions to accommodate expansion.
- Stain and etch resistance: Unglazed tiles can darken with oils or show marks from acidic foods if poorly sealed. Glazed surfaces shrug off many spills but may show micro-scratches more readily depending on finish.
Think of Cotto as a living surface. It gets better with sensible care, and its small quirks become part of the charm.
Installation Choices That Shape the Look
The way you set Cotto transforms its character.
- Pattern: A running bond calms visual rhythm. Herringbone adds energy and elongates small rooms. Hexagon and Arabesque shapes bring old world flair without feeling dated when paired with minimal grout color.
- Joint width and grout: Wider joints highlight handmade edges and produce a classic Mediterranean look. Narrow joints feel tailored and contemporary. Color-match grout for a seamless field or choose a contrasting hue to outline geometry.
- Layout orientation: Diagonal layouts expand tight spaces, while straight grids emphasize order. On walls, stack vertically to draw the eye upward or stagger to soften tall surfaces.
- Setting materials: Use a high-quality modified thinset, back-butter thicker or irregular tiles, and consider a medium-bed mortar where thickness varies. For substrates, ensure flatness and minimal deflection so the tile does not telegraph unevenness.
A dry layout on site helps you orchestrate color blends, edge variations, and pattern transitions before anything is fixed in place.
Maintenance That Preserves Patina
Cotto maintenance is not fussy when you build a routine around the material.
- Sealing strategy: For unglazed tiles, apply a penetrating sealer that fills microscopic pores without forming a plastic-like film. In kitchens or entries, a second coat may be worthwhile. If you want a soft sheen, a topical finish can add glow, but expect more frequent reapplication.
- Cleaning rhythm: Sweep or vacuum grit that can abrade the surface. Mop with a pH-neutral cleaner. Skip harsh acids that etch or bleach. In stain-prone zones, spot clean promptly and reseal heavy-traffic paths yearly or as water no longer beads on the surface.
- Patina mindset: Minor scuffs, soft burnishing near thresholds, and variations in sheen are not defects. They are the fingerprints of use that give Cotto its lived-in, enduring appeal.
Budgeting and Value
Cotto’s cost is a blend of material and craftsmanship. Handmade tiles, thicker formats, and intricate shapes land at the higher end. Installation labor increases with irregular edges and large patterns. Budget more for substrate prep and setting materials than you might for rectified porcelain.
Value appears differently with Cotto. Resale-conscious homeowners appreciate the timelessness and the way warm floors complement wood, stone, and plaster. When installed thoughtfully, Cotto feels bespoke, which can elevate an otherwise modest renovation.
Sustainability and Sourcing
Clay is available, and many Cotto producers fire at more efficient temperatures and cycles. Reclaimed Cotto from old buildings has history and minimizes new material consumption, but sorting and calibrating need manpower. Ask about clay origin, fuel type, and packaging if environmental impact important. With adequate maintenance, Cotto can achieve the most sustainable tile: decades without replacement.
Design Playbook: Three Mini Scenarios
- Characterful sunlit kitchen: Choose unglazed, medium-thickness square tiles in mixed sienna tones. Lay in a diagonal grid with 6–8 millimeter joints, grout a shade lighter than the body, and seal with a penetrating agent that darkens the field. Glow without glare with limewashed walls and brushed brass.
- Calm bath with texture: Select a glazed Cotto in a soft off white for walls and an unglazed, sand-textured hex for the floor. Keep joints tight and grout in a tone that blends. Use vertical stacks in the shower to underscore height, and run a single tile border at vanity height for quiet structure.
- Durable transitional entry: Dense, low-absorption Cotto in charcoal-warm clay. Herringbone design on a level base, larger grout seams to show skill, and matte penetrating sealant for traction. To handle dirt and moisture, install a stone door threshold.
Common Mistakes to Avoid
- Ignoring porosity: Installing high-absorption tiles in a wet zone without a sealing plan leads to blotches and frustration.
- Skipping substrate prep: Cotto is honest. It will broadcast uneven subfloors. Flatten before setting.
- Choosing the wrong sealer: A glossy topical finish on a busy kitchen floor may scuff and peel. Match sealer type to traffic and desired sheen.
- Tight joints with handmade edges: Forcing narrow grout lines where edges vary can create lippage and uneven sightlines.
- Overcleaning with harsh chemicals: Acidic or high-alkaline solutions can etch or haze the surface, diminishing the very qualities that make Cotto special.
FAQ
What is the difference between terracotta and Cotto?
Terracotta previously meant rustic, low-fired, porous clay tiles. Today, cotto covers terracotta and denser, higher-fired clay tiles that may be glazed or presealed. Cotto might be rustic or elegant, so evaluate absorption, polish, and application.
Can I use Cotto tile in a shower?
With the correct product and detailing. Glazed Cotto walls work effectively in moist situations. Shower floors should be slip-resistant and waterproofed behind tile. Unglazed, very porous tiles should be utilized on dry floors or walls outside splash zones and sealed aggressively.
How often should I reseal unglazed Cotto?
Frequency depends on traffic and exposure. In kitchens and entries, plan on evaluating annually. If water no longer beads or dark stains linger after spills, it is time to reseal. Low-traffic rooms may go several years between coats. Always clean and dry the surface thoroughly before resealing.
Is Cotto tile suitable for cold climates outdoors?
Only with frost-resistant tile and proper waterproofing, drainage, and movement joints. Due of high absorption, many traditional terracotta goods spall in freeze-thaw cycles. Check supplier frost resistance and cover areas for further protection.
Will Cotto scratch or chip easily?
Softer, handmade Cotto can show scuffs, especially before sealing, although they fade into the patina. Denser or glazed versions wear less. Avoid pulling heavy furniture, use entrance mats, and remove abrasive grit. Tinted sealers or grout hide minor chips.
Can Cotto be installed over radiant heat?
Yes. Cotto’s thermal mass pairs well with hydronic or electric radiant heating. Ensure a stable substrate, use appropriate mortars, and honor expansion joints around the perimeter and at transitions to accommodate movement as the floor cycles through temperatures.
What grout color works best with Cotto?
There is no single best choice. Color-matched grout creates a continuous field that emphasizes tone and texture. A slightly lighter or darker grout reveals the pattern and edge character. For handmade tiles with wider joints, a midtone that echoes the clay often yields balanced, forgiving results.
How do I control shade variation during installation?
Open multiple boxes, mix tiles from different cartons, and dry lay a portion of the floor or wall to curate distribution. Pull out pieces that are too light or dark for prominent areas and save them for less conspicuous zones. This step is essential with artisanal tiles that vary within each batch.