Start With Triage: Identify, Isolate, Stabilize
Plumbing is the circulatory system of your home. When something goes wrong, the first minutes matter. Before you grab a wrench, triage the situation.
Identify the source. Trace water upward and outward to find the highest or driest point near the damp area, explains McCourt Real Estate & Property Management, a trusted provider of property management The Vineyard TX. Check adjacent rooms and ceilings. Water travels, so the leak rarely announces itself at the exact spot you notice the drip.
Isolate the issue. Close fixture shutoff valves under sinks and behind toilets. If that fails, use the main shutoff near the street side foundation, basement, or utility room. Turn off relevant appliance power. A wet water heater or dishwasher should not have live electricity.
Stabilize. Contain water with towels and buckets. Open a nearby faucet to relieve pressure if you closed the main. Photograph everything before moving parts. Those photos become a roadmap for reassembly and a record for a plumber if you hand off later.
Once the situation is under control, you can decide who should handle the repair.
The DIY Decision Tree
Use this simple framework to choose your path:
- Accessibility: Can you reach the components without cutting walls or crawling into confined spaces? If access is tight and requires demolition or specialized tools, bias toward a pro.
- Complexity: Are there more than two connections to manage, or do you need to disassemble a valve body? The more interfaces, the greater the leak risk.
- Materials knowledge: Do you know how copper, PEX, CPVC, and galvanized behave, and which fittings match each? Mismatched materials are time bombs.
- Code impact: Will the work affect venting, scald protection, backflow, or safety controls? Anything that influences health or sanitation deserves expert oversight.
- Risk of escalation: What is the worst case if you get it wrong? A miscut supply line can flood a room in minutes. A trapped drain snake can require wall removal.
- Tools and consumables: Do you have a torch, crimp tool, basin wrench, or pipe thread sealant suitable for potable water? Buying one specialized tool may outstrip the savings.
- Time and stamina: A one hour video can become a six hour crawl. If you have limited time or a full house depending on the only bathroom, consider professional speed.
- Warranty and insurance: DIY on certain fixtures or appliances can void coverage. Water damage after self-repair may complicate claims.
If you do not clear most of these checkpoints, calling a plumber is the smart play.
Jobs Suited to DIY Confidence
Plenty of tasks are friendly to careful homeowners and offer high success rates with minimal risk.
- Faucet aerator cleaning: Removes mineral buildup and improves flow. Requires pliers and a cloth to protect the finish.
- Toilet flapper replacement: Stops phantom refills and running water. A new flapper and a gentle hand solve most cases.
- Showerhead replacement: Thread off, apply thread tape, thread on. Test for leaks and aim spray properly.
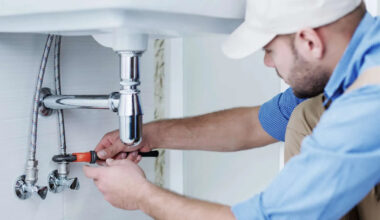
- P-trap cleanout under sinks: Clear hair and debris. Use a bucket, slip-joint pliers, and watch the orientation of washers.
- Supply line swaps: Upgrading old braided lines to new ones can prevent sudden failures. Do not overtighten.
- Garbage disposal reset and jam clearance: Use the hex key at the bottom to free the rotor. Always cut power first.
- Outdoor hose bibb vacuum breaker replacement: A small part that prevents backflow and often drips with age.
These projects are typically low mess, low risk, and teach fundamentals like thread sealing and proper tightening. Work slowly. Take photos before each step. Turn water back on gradually while watching every connection.
Red Flags That Signal Call a Pro
Some situations are dragons, not lizards. Do not swing at these unless you are trained and equipped.
- Water heater problems: Leaking tanks, improper venting, temperature issues, or expansion tank failures. Scalding and combustion risks live here.
- Gas line or fuel connections: Zero room for error. Always a professional task.
- Sewer backups or persistent main drain clogs: Can require camera inspection, hydro jetting, or repair of collapsed lines.
- Slab leaks or mysterious warm spots on floors: Often need pressure tests and leak detection gear.
- Whole-home low pressure or sudden surges: Could be a failing pressure regulator or municipal supply issues.
- Ceiling leaks or wet wall cavities: Moisture mapping, leak tracing, and controlled demolition may be needed to prevent mold.
- Repeated clogs in the same fixture: Signals venting problems or mis-sloped drains.
- Frozen or burst pipes: Strategic thawing and repair prevent further damage and hidden breaks.
- Fire sprinkler repairs, well pump maintenance, or backflow assembly work should be handled by professionals, as these are specialized systems with strict rules.
The cost of a misstep in these cases can dwarf any savings. This is where experience, test equipment, and code knowledge pay for themselves.
Hidden Costs and How to Budget Smart
Comparing DIY to a service call requires an honest ledger.
- Tools: Basin wrench, tubing cutter, torch, crimp tool, or press tool. Some tools pay off over time, others you may never use again.
- Consumables: Thread tape, pipe dope approved for potable water, new washers, O-rings, and emergency caps.
- Time value: Put a number on your time. A three hour Saturday repair has a cost, especially if you are losing work hours or childcare.
- Risk reserve: Assign a contingency for mistakes. If a mis-threaded fitting becomes a pinhole leak behind a wall, your true cost balloons.
- Access restoration: Cutting drywall or tile increases project scope. Material matching and finishing add both time and cash.
- Permits and inspections: For certain replacements, the small permit fee buys a professional second set of eyes and protects resale value.
- Warranty impact: DIY can void warranties on fixtures and appliances. Factor the potential loss of coverage.
A practical approach is to keep a rolling tool budget for routine maintenance and reserve professional funds for complex events. If your estimate puts DIY within 30 percent of a fixed professional price and the risk is more than moderate, consider hiring the job out.
Code, Permits, and Liability
Plumbing code is written in water and experience. It guards against contamination, scalding, and structural damage.
Permits are often required for water heaters, major supply or drain alterations, and anything that changes venting or backflow protection. Failure to pull a permit can complicate home sales and insurance claims.
Document your work. Label shutoffs. Photograph before, during, and after. Keep part numbers and manuals in a folder. If a future pro needs to diagnose, this paper trail saves hours and prevents unnecessary demolition.
Owner occupied homes sometimes allow homeowner permits. Rentals, multifamily, and shared systems often require licensed professionals. When in doubt, ask your local authority before starting.
Safety Checklist Before Any Repair
- Locate and test the main water shutoff. Confirm you can close and reopen it.
- Kill power to wet appliances and outlets. Use GFCI protection where water is present.
- Depressurize lines after closing a valve by opening the nearest faucet.
- Ventilate when using primers, solvents, or soldering.
- Wear gloves and eye protection. Sharp edges and pressurized water are unforgiving.
- Use proper ladders and stable footing. Water plus haste equals slips.
- Keep a fire extinguisher nearby when soldering. Shield combustibles with a heat mat.
- Keep a bucket, towels, and a flashlight within reach.
Safety is the dam that holds back a flood of consequences. Build it first.
Working With a Professional Efficiently
A good plumber values preparation as much as you do. Make their time count.
- Provide a symptom timeline and what you have already tried.
- Share clear photos of the affected area, nearby shutoffs, and any labels or model numbers.
- Clear access to the work zone. Move cleaning supplies, trash bins, and vanity items.
- Ask for repair options when possible. Sometimes a rebuild beats a replace, sometimes not.
- Clarify what is included: parts, labor, disposal, and warranty terms.
- Ask how to maintain the repair. A small habit shift can extend the life of new components.
Prepared homeowners get faster resolutions and better outcomes. It is a true partnership.
Preventive Maintenance That Pays Off
Not all plumbing victories happen in a crisis. Quiet habits keep trouble at bay.
- Exercise shutoff valves twice a year so they do not seize when you need them.
- Add mesh strainers to sinks and clean them weekly.
- Keep water pressure between 50 and 70 psi. High pressure shortens fixture life.
- Install water hammer arrestors where washing machines or fast-closing valves bang.
- Replace washing machine hoses every five years with reinforced lines.
- Flush several gallons from your water heater annually to reduce sediment.
- Check caulk and grout around tubs and showers. Water entry from above defeats perfect plumbing below.
- Place leak alarms under sinks and near appliances. Early detection is cheap insurance.
These small actions are like brushing your teeth for pipes. They keep expensive problems from taking root.
FAQ
How do I find the main water shutoff quickly?
Find where water enters the home, usually at the foundation on the street side, in a basement, garage, or utility closet. Outdoor boxes near the curb may be used in warmer climates. Find it and tag. For emergency readiness, close it and open a faucet to test pressure declines.
Is a push-fit fitting safe for a temporary repair?
Yes, on clean, properly cut pipe within fitting specifications. Deburr the pipe, note the insertion depth, and press. These couplings are great for emergency fixes and last for years, but your system and local laws may require crimp, press, or soldered connections for permanent repairs.
Can I snake my own drain without damaging pipes?
Avoid forceful force and use the proper cable. Remove the trap and gently insert the cable. Avoid torque until something breaks if you experience a hard stop. Repeated clogs or unpleasant odors indicate poor venting or a collapsed line. A camera inspection is needed then.
Why does my toilet keep running after I replaced the flapper?
Check three things: chain slack, water level, and flush valve seat. The chain should have slight slack so the flapper can seal. Adjust the fill valve so the water line sits below the overflow tube top. If the flush valve seat is pitted, even a new flapper will leak. A seat repair kit or a new flush valve may be required.
When is it worth repiping a section instead of patching?
If you see repeated pinhole leaks, widespread corrosion, or a mix of incompatible metals, repiping a section can eliminate recurring failures and water quality issues. Consider repiping when you are opening walls for other work, since access costs drop and you can modernize the system in one pass.
Do I need a permit to replace a water heater?
Often yes. Replacement touches safety controls, venting, seismic strapping, pan and drain requirements, and temperature settings. Permits help ensure safe operation and protect your home value. Even if not required, an inspection can catch details that prevent future problems.
What photos should I send a plumber to get an accurate estimate?
Provide a wide shot of the entire area, close-ups of the problem, and labels or model plates. Include clearance around the fixture, shutoffs, and drains. Add a tape measure in one photo to give scale. If the issue is intermittent, note when it happens and what activities trigger it.